This is so easy to make and cheaper than a normal jewelry box. Not to mention, you get to make it way cuter.
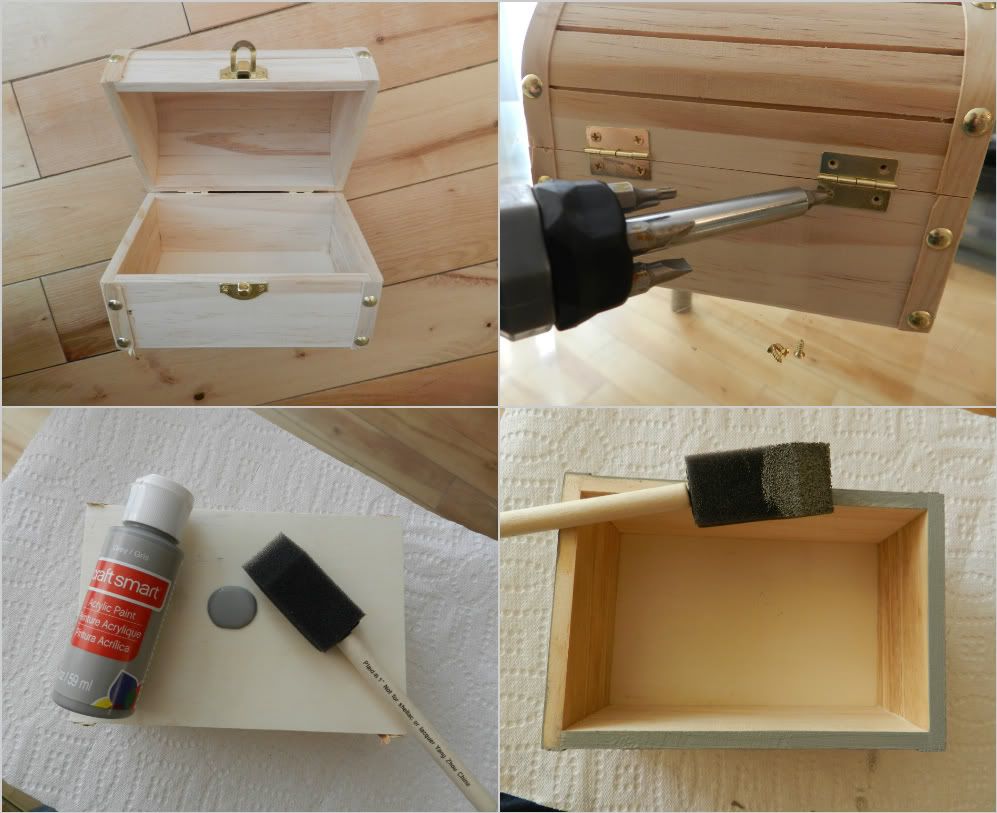
Step 1: Pick out a wooden box; I found this one at Michael's. Take apart the latch and hinges and start painting whichever color you prefer. I only used about half a bottle. Don't paint the insides.
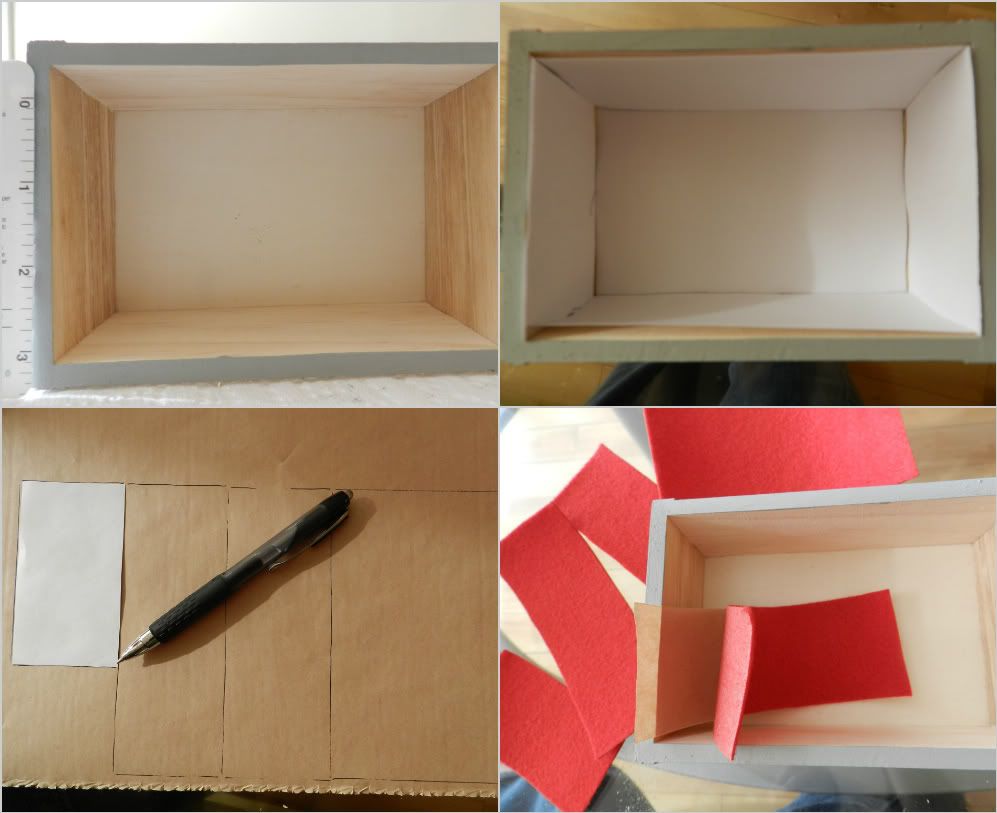
Step 2: After about 4 - 5 costs of paint let dry 1 - 2 hours. I found felt that had an adhesive backing at Michael's which makes it really easy to apply. Measure the inside and make paper outlines of what you will use. This way you can test out the sizes. Next trace the outlines on the back of the felt and cut out to apply.
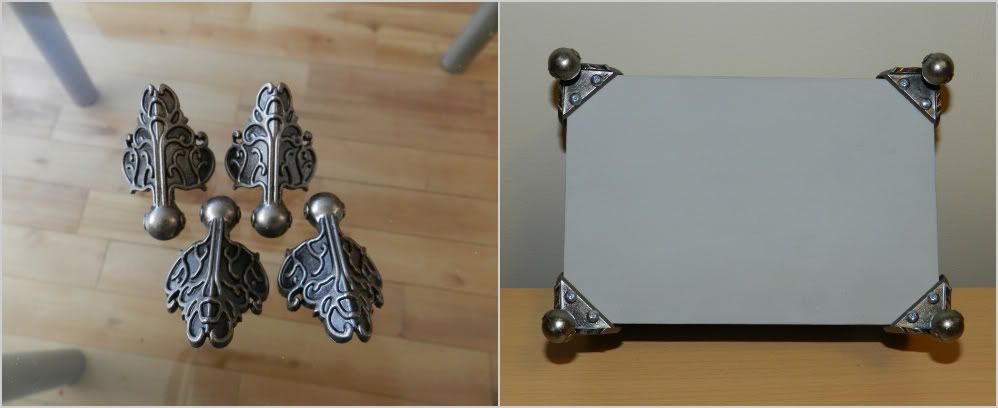
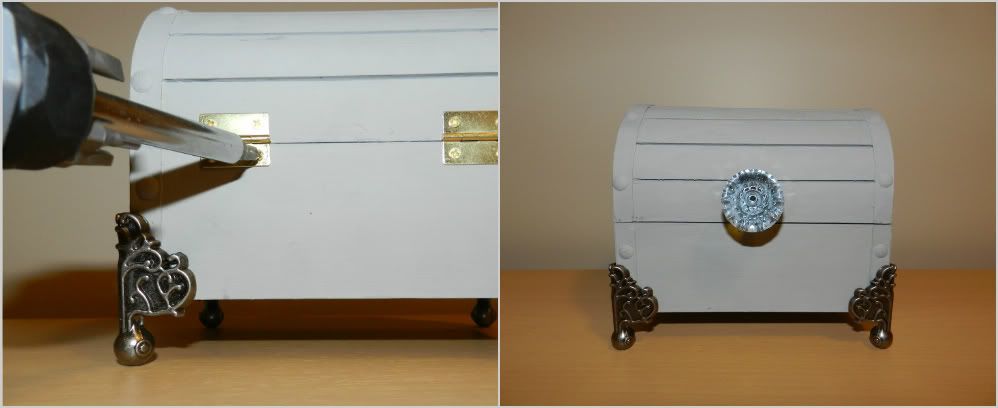
Step 3: I got these awesome legs at Michael's for $10. It really makes the jewelry box chic so I had to splurge. I got regular screws and put one on each corner on the bottom.
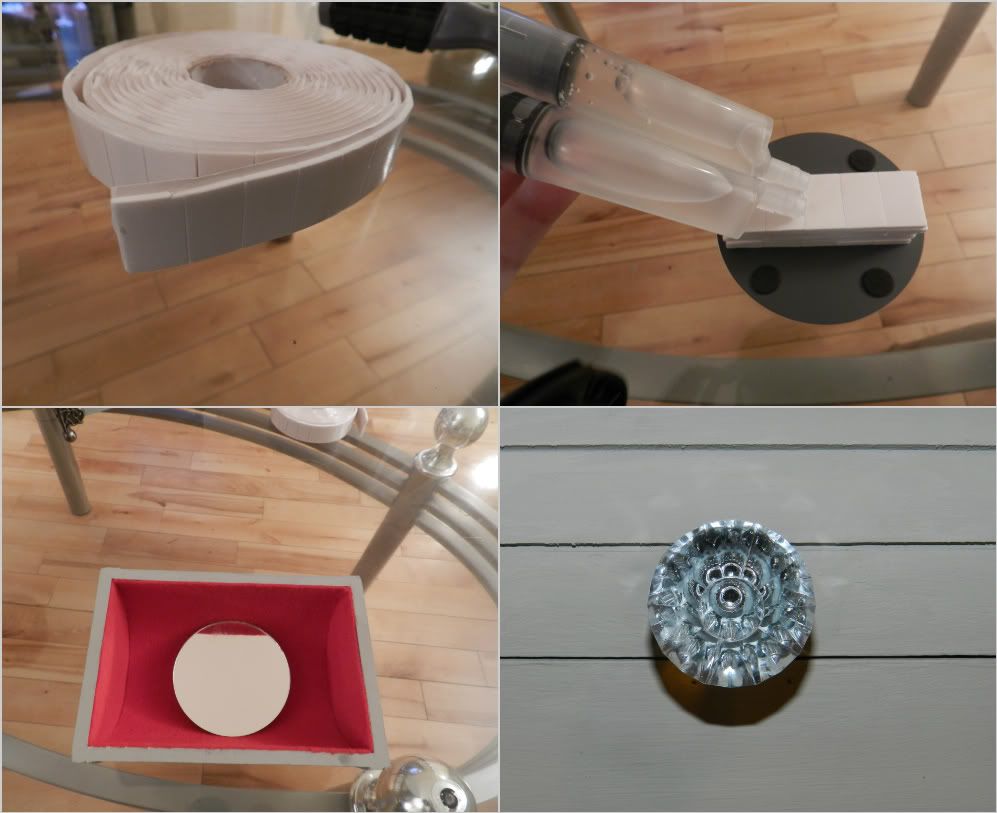
Step 4: To apply a mirror inside apply several layers of double-sided mounting tape to the back of the mirror so that it fits nicely in. Next use expoxy glue to hold in place. Use expoxy glue to a knob, if you choose to use one, and let the glue set overnight.
Step 5: After the glue dries, you can make final touch ups with the paint and then screw the hinges back in and voilà!
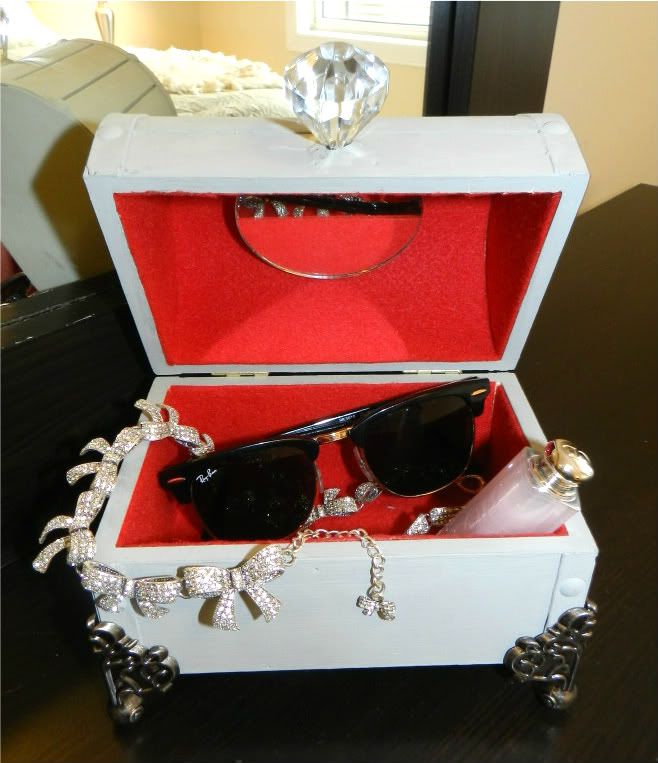
Add your favorite jewelry and accessories and you've got a Chic Jewelry Box!
That looked fun to do! I love making stuff out of wood! Would like to do more extensive woodwork and get a ban saw or scroll saw to make some neat stuff! Good job Brit!
ReplyDeleteAs a suggestion, the font on this blog is a little challenging to read small. I can read it ok but others may have a little trouble. Just my two cents. Glad you started a blog though. Hope you have more of these soon! You should really talk about what you did for your wedding! You did some awesome stuff!
ReplyDeleteAwesome! You've inspired me on how to refurbish my empty cigar box of similar dimensions, thanks!
ReplyDelete